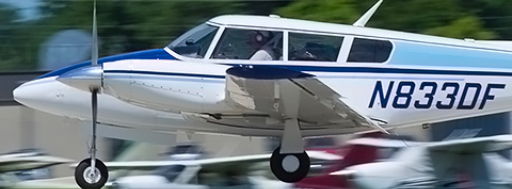
YouTube can be awesome in how it connects you to others. Carter reached out from Texas to ask about performance numbers for the Twin Comanche after watching my videos there.
I couldn’t put my hands on the matrix I had developed so many years ago with Rink in C-172s, nor the one I did for the PA30 with Mike B. Often I’ll build one if I’m getting into a new type airplane and starting fresh. I did that informally by watching the numbers that the previous PIC in the Cheyenne used, and listening to the instructor I had over in Hammonton, NJ.
Once you figure out what power and propeller settings to use for each phase of flight, you will then be able to make the airplane do what you want with minimal effort. The effects of your power management are repeatable and adjustable for conditions.
To help Carter just get started in the airplane, these general guidelines should help him reduce his workload and get to know the Twin Comanche.
Safety
The Twin Comanche is safe to fly. If you are taking 4 people along, you should limit your fuel and ship your bags through the mail. With 4 people and just the mains filled, you are close to deciding to just land if you lose an engine. You’ll do fine if you train once a year or more, and make your emergency procedures routine.
Runup
My procedure is very different for the runup, due to the fact that I replaced the left magneto on each engine with the electronic electro-air ignition system. I love the results I’ve seen, particularly the reliable hot starts and increased power at altitude.
Takeoff
Take-offs in the Twin Comanche are different due to the low profile and ground clearance. Ground effect causes the airplane to lift off at or below Vmc, which can be dangerous. Holding the nose down just leads to wheel barrowing down the runway. Lifting off below Vmc leads to a shorter lifespan for the pilot, so let’s not go there either. Just fly in ground effect like a short field takeoff, and watch how the aircraft accelerates quickly out of the danger zone.
- Mixtures and Props full up
- Rolling T/O with full power. Don’t lean unless you are taking off from a 3000’ msl runway or higher
- At 80 mph, the airplane will fly in ground effect. This is at or near Vmc, so don’t just climb out. Instead fly just above the runway in ground effect and you will accelerate to 105 mph (blue line) readily.
- Pitch up and climb until clear of obstacles. Lower the nose to 130 mph for effective cooling. My aircraft has the hottest cylinder hitting 430oF in summer if I climb too steeply.
Climb
- At 500’, set 25 squared: 25” manifold pressure first, and then 2500 rpm on the props.
- Watch your cylinder temps on the way up and increase speed to cool
- On the way up, use your judgement or when passing 6000’, lean the mixture and increase power. Watch your cylinder temperatures and don’t lean in summer if a cylinder is hot. Lower the nose for better cooling as needed. Leave cowl doors open until cruise or temperatures allow.
Cruise
- Level off; expect about 172kts TAS at 24 squared
- Adjust pitch trim, center the heading bug, and hold your altitude.
The next few steps are a flow…. Left to Right power, props, mixture; down to cowl flaps
- Power to 24” and Props to 2400; Lean to 8 gph on both sides.
- The power and prop settings can vary, but this gives me the smoothest ride for my airplane
- 8 gph works fine. I care less about fuel burn and more about engine health. With electro-air ignition, I can actually lean to 5.7gph per side for loitering about.
- Close Cowl Doors
- Fuel Pumps ON; change to AUX Tanks one at a time.
- Fuel Pumps OFF; one at a time; check pressure; check indication on the fuel gauge to be sure you switched cleanly
- Adjust pitch trim, center the heading bug, and hold your altitude.

- AUTOPILOT in cruise mode
- Turn on autopilot in heading (lateral) mode (1) and (2)
- Turn on the Aspen GPSS mode as desired.
- Turn on Pitch Mode (8), and then rotate the Altitude Selector Knob (7) until the trim indicator (6) is level. Then engage Alt Hold Mode (4).
Descent
- Disengage altitude hold and pitch mode on the autopilot
- While mine is fully functional, the pitch mode in climbs and descents is better managed manually.
- Manually pitch down about 5 degrees and retrim pitch
- Descend at 500 fpm minimum for ATC expectations, and reduce power to stay out of the yellow arc. Increase mixture as required during the descent.
- Level off at step altitudes using the cruise flow discussed above.
Approach
- Let’s say you are doing a procedure turn inbound. Pick an arbitrary distance from the initial point of entry that will give you enough time to slow down and reconfigure.
- 3nm from initial point, reduce power to 20” MP and leave the props up at 2400.
- Entering the hold/procedure turn; your target speed is 130 mph. Set power initially to 17” MP and adjust as necessary. I fly 130 mph for automated approaches due to an autopilot limitation, and 120 mph if I’m handflying.
- If you need to descend in the hold, try 15” MP and manage speed with pitch.
- Procedure turn inbound; your target speed is 130 mph. Set power initially to 17” MP and adjust as necessary.
- At glideslope intercept, gear down and go down.
- GUMPS happens here at a minimum (Gas (pumps on); Gas (on the main tanks); undercarriage (light showing down and locked); undercarriage (look in the window); Mixture (rich both); props (set 25 or say ‘To Go’ and do it later); Switches (lights), Switches at the field.
- 17” is my starting point; hold the glidepath and adjust power to hold 130 mph (autopilot) and 120 mph (manual)
Note that I do not use flaps on my approaches, but I will deploy them if I break out early enough. This is counter to my airline training, and my instrument training, and how I fly the Cheyenne. However, it works very well for this airplane (PA30). I often practice landing with no flaps, and every increment after that; making sure I can do it when flying down to minimums.
If you decide to fly the approach clean, then I recommend NOT adding flaps prior to landing during your check-ride. He’ll have a problem with that.
Go-Around
- Props are already up – set 25” MP. I do not recommend firewalling on the go-around. 25 squared works well.
- CRAM (Power to 25”)-CLIMB (pitch up at least 5o and verify climbing)-CLEAN (gear up, flaps up)-COOL (cowl flaps open).
Landing
- I hold 110 mph to the fence and ease the power out to 105 before touch down. I’m doing this from memory, and I often come in hotter with jets behind me, and slow down at the last minute. The key is to slow enough in your approach to get the gear out below 135 mph (150 gear speed is hard on them), and then keep it moving until closer in.
Single Engine Work
- This is for your instructor and is not a prescription for training. Make sure your instructor tells you how he/she will fail an engine and when. I feel that it doesn’t add much to the training if you are surprising the student. I also make it clear when the instructor should NOT shut down an engine for training. Be sure to discuss this.
- Just be careful here – we just lost a PA30 when a man was flying with his wife and delayed shutting down an engine. The aircraft flies just fine on one engine, and if it doesn’t, you are landing right now like your single engine friends do. Do things efficiently and smoothly. You don’t have all the time in the world, but you do have time.
Vmc Demo
I recommend not doing this training with an aft CG, so don’t have anyone observing in the back seat and do perform a W&B. There was just a school accident last week that had someone in the back. Rear CG makes the empennage controls less effect due to the lesser moment arm available to the rudder.
- I have been shown a very effective Vmc demo that demonstrates our airplanes very well. Again – I’m not giving you instruction here, just sharing a story that you can discuss with your instructor.
- Climb to 3000’.
- Agree and brief that the INSTRUCTOR will control the power quadrant and the student will use pitch and trim to control airspeed.
- Reduce power (instructor)
- Trim and fly the airplane at 80 mph (Student). This is the OLD Vmc speed that was used to train pilots when the airplane was first coming out, and the reason the accident rate was so high.
- With the airplane trimmed and descending at 80 mph, the instructor then gently – very gently – adds power to the right engine. The airplane will roll and yaw aggressively toward the dead (lower powered) engine almost immediately. The effect is eye opening.
- Repeat for the other engine and the effect is the same.
- Climb back to altitude and do the above maneuver again
- Have the student trim for a descent at 90 mph, and observe the differences. The airplane is much more controllable at the NEW and Safer Vmc of 90mph.
The scenario to discuss is one I’ve seen pilots bragging about. Flying a Twin Comanche into a short field at a very low airspeed (80mph) can be done, and these guys are doing it. Picture this, however, the landing looks like it is coming up short so the pilot adds power.
If only one engine responds, you just demonstrated how fast the airplane would roll over! Don’t do it.
Note: This posting is not intended to be instruction. Twin training can be dangerous, so a solid briefing before every flight is warranted.
Fly Safe!